Preparing for WSET 3: What it’s like and tips for study!
Discover effective strategies for WSET Level 3 success, including structured planning, mastering sparkling & fortified wines, & focusing on command words for exam readiness.
Make 2026 THE year.
Take 10% OFF your first 12 months of Tasting Group!
Code:

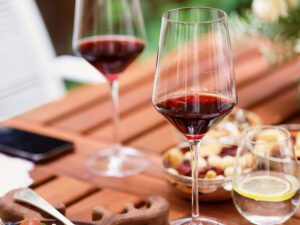
Tasting groups are great!
There is real value in sitting down with other people, comparing what you are getting in the glass, and using those conversations to calibrate your palate. It’s why I built an accessible virtual one! When someone else says “high acid” and you feel it too, it’s somehow better ingrained in your head.
The problem is that tasting groups are genuinely hard to keep together. People in wine work unpredictable hours, schedules fall apart, and if you are early in your studies, walking into a blind tasting session before you have built any real reference points can feel more intimidating than educational.
A lot of serious wine students end up studying alone, at least some of the time!
This is not always a disadvantage, it’s just a different kind of practice, and it works when you approach it with structure.
This post walks through a simple, repeatable approach to solo wine tasting practice, starting from the very beginning and building toward tasting confidence over time.
The common assumption is that you need other people to make real progress. That is not always correct.
I would argue what you need more is repetition, comparison, and a way to check yourself. All three of those things are available even when you are practicing alone. What solo practice requires is a bit more intentionality, because there is no one else in the room to catch what you missed.
The overall goal is to build pattern recognition through deliberate, structured repetition. 😊
This is the most important piece of advice in this entire post: do not start with blind tasting.
If you are studying for an exam with a blind tasting component, it can feel like you should jump straight into blind practice. That instinct makes sense, but it tends to backfire. Blind tasting without any reference points is mostly guesswork, and guessing does not build skill.
Open-label comparative tasting means tasting wines with the labels visible so you can learn what each wine looks, smells, and feels like before you ever try to identify it without seeing the bottle. You are building a library of sensory memory, not testing yourself yet.
Here is how to set it up:
Comparative tasting works because contrast makes structure easier to feel. A high-acid wine is much easier to recognize when there is a lower-acid wine sitting next to it. Same with tannin, body, and alcohol.
You are not trying to memorize a list of descriptors. You are training your palate to feel the difference.
One of the most common mistakes new tasters make is trying to write everything down. A long, detailed tasting note sounds thorough, but it is hard to retain and even harder to review.
Start minimal. Here is a simple format to follow:
Structure first. Structure refers to a wine’s acid, tannin, alcohol, body, and related physical cues. These are the elements that give a wine its shape and feel in the mouth, and they are the foundation of any reliable tasting methodology. Taste the wine and ask yourself: what is the most elevated structural element? Is it the acid? The tannin? The body? The alcohol? Pick one or two structural cues that genuinely stand out and write those down. Not all of them. Just the ones that are clearly elevated.
Fruit next, by category. At the beginning, do not try to identify specific fruits. Instead, note whether the wine fits an overarching category! Most tasting grids have these chunked as citrus, orchard (tree fruit), stone fruit (the one’s with pits), and tropical fruit for whites. And red berries OR black berries for red wines. Category is enough. Specificity comes later, once the broader patterns are stable.
One or two standout observations. If something else is obvious, write it down. Oak, green notes, age notes, floral character. Keep it to one or two things that are genuinely noticeable, not a full inventory.
That is your note. Short, focused, and reviewable.
This approach is all about capturing what you can actually use and remember!
Once you have a note written, check it against a professional reference.
This is calibration: comparing your impressions against a trusted reference point so your palate becomes more consistent over time. It is also a form of benchmarking, which means you are measuring your observations against a reliable standard.
A few things to keep in mind:
There are plenty variety-level tasting notes available from reputable sources. The Variety Libary the GG site can help you understand what you are looking for at each stage.
Once open-label comparisons start to feel more familiar, you can begin introducing a small amount of blind practice. The transition should be gradual.
A mini blind session is exactly what it sounds like: a short, low-pressure blind tasting with just two wines. You are not trying to identify a full flight. You are testing whether you can describe what is in the glass without seeing the label, and then narrow down what you think it might be.
Here is how to approach it:
The sequence matters. Observations before conclusions. Even with just a few notes, this is the foundation for the same approach used in tasting formats commonly assessed across major wine certification programs.
No tasting partner at all? That is fine. You can still run an effective blind practice session.
This is called a double blind setup. You know what wines could be in your glasses, but you do not know which is which.
Here is a simple way to do it:
It sounds almost too simple, but it works. You still have to describe what is in the glass without the label in front of you, and that is the core skill you are building.
For this kind of practice, having a small stash of reliable, testable wines is helpful. A set of commonly available international varieties is a good starting point.
If you want to revisit the same wines over multiple sessions, a Coravin or similar preservation tool can help extend bottle life.
You do not need a lot of time. You do not need a perfect setup.
What you DO need is consistency.
One side-by-side tasting session per week is enough to keep your palate developing, especially in the early stages. That might be two glasses on a Tuesday evening with a few post it notes! I still find myself doing this ‘quick blind’ when I’m short on time.
A few habits that help:
Building a tasting library over time, even a small one, gives you reference points that compound. The more wines you have tasted intentionally, the faster you can orient yourself in a new glass!
When you get a wine wrong in a blind session, that is not a failure. It is the most useful piece of information! I learn the most when I guess wines wrong.
Here is what to do with a miss:
Over time, you will start to notice recurring weaknesses. Maybe you consistently over-call tannin. Maybe you struggle to distinguish body from alcohol. Maybe acidity is hard for you to gauge in certain styles.
Those patterns are your training plan. A targeted session on acid, for example, using a high-acid wine next to a lower-acid one, will teach you more than a general tasting of six random bottles.
Track improvement by what you can identify now that you could not six months ago.
There is no fixed timeline for moving from open-label practice into full blind tasting. The signal is not a date on a calendar. It is whether your observations feel stable and you are feeling confident and comfortable!
When you can sit down with a wine and reliably identify its structural profile, describe the fruit category, and add one or two meaningful observations, you then have the foundation you need to start expanding.
From there:
Students studying within the WSET system or preparing for other exam-based wine study will find that this foundation supports the observation skills required in formal blind tasting assessments.
You do not need a perfect setup or a group to get you started. You need a repeatable process, a little consistency, and a willingness to treat every session, including the ones where you get it wrong, as information!
| Stage | What to Do | What to Focus On | When to Move On |
|---|---|---|---|
| Open-label comparative | Taste two wines side by side with labels visible | Structure, fruit category, one or two standout observations | When open-label notes feel consistent and recognizable |
| Mini blind (two wines) | Have someone pour two wines without showing labels, or use a double blind setup | Observations before conclusions, structure first | When you can describe both wines reliably before guessing |
| Mini blind (three to four wines) | Expand the blind set gradually | Narrowing down variety or style from observations | When your descriptions are stable and your guesses are improving |
| Full blind tasting | Taste a flight without any prior knowledge of contents | Complete structured note from appearance through conclusion | Ongoing |
| Category | Prompt | Example Placeholder |
|---|---|---|
| Structure | What structural element stands out most? | High acid, firm tannin, full body |
| Fruit | What category of fruit are you getting? | Red fruit, black fruit, citrus, stone fruit |
| Extra observation | Is there anything else obvious? | Oak, green notes, age notes, floral character |
| Practice Type | Best For | Difficulty | Goal |
|---|---|---|---|
| Open-label comparative | Beginners building a reference library | Low | Learn what each variety looks, smells, and feels like |
| Mini blind (two wines) | Students transitioning from learning to testing | Medium | Practice describing a wine without the label as a cue |
| Full blind tasting | Students with a stable tasting framework | High | Apply a complete tasting methodology under exam-like conditions |
Discover effective strategies for WSET Level 3 success, including structured planning, mastering sparkling & fortified wines, & focusing on command words for exam readiness.
Explore the seductive alchemy of Grenache, Syrah & Mourvèdre: deep, layered blends with spice, smoke, and elegance.
Explore how biodynamic farming integrates lunar cycles, cosmic rhythms, and holistic vineyard practices to produce wines that reflect a deep connection to nature.
(Ease into wine tasting basics!)
(Build on basics & learn to blind taste!)

By submitting, you are consenting to receive marketing emails from The Grape Grind. You can unsubscribe at any time.
Grab our two totally FREE courses:
(Ease into wine tasting basics!)
(Build on basics & learn to blind taste!)
Just enter your email and we’ll send them right away!
By submitting, you are consenting to receive marketing emails from The Grape Grind. You can unsubscribe at any time.
Learn to taste & BLIND taste wine: